Rooting your Moto G Pure can unlock a whole new world of possibilities, allowing you to customize your device and access advanced features. In this comprehensive guide, we will walk you through the process of how to root Moto G Pure without the need for a PC. Rooting your device can provide numerous benefits, such as installing custom ROMs, removing pre-installed bloatware, and gaining full control over your device’s settings and performance.
However, it’s important to note that rooting your Moto G Pure also comes with risks, such as voiding your device’s warranty and potential security vulnerabilities. With that said, we will provide you with step-by-step instructions using various methods to safely root your Moto G Pure without a PC. Whether you’re a tech enthusiast looking to explore the full potential of your device or simply seeking more control and customization options, this guide on how to root Moto G Pure will help you achieve your goal. Let’s dive in!
Table of Contents
Pre-requisite for how to root moto g pure

Before embarking on the process for how to root Moto G Pure, it is important to ensure that you have all the necessary requirements in place. These prerequisites will help you prepare your device and mitigate any potential risks. Here are the essential steps to follow before how to root Moto G Pure:
- Backup your data: Rooting involves modifying system files, which can sometimes lead to data loss. It’s always a good practice to back up all your important files, photos, videos, contacts, and any other data you want to keep safe. You can use cloud storage services or connect your device to a computer to create a backup.
- Charge your device: Rooting can be a time-consuming process, and it’s essential to have your Moto G Pure adequately charged. Make sure your device has at least 50% battery life before proceeding with the rooting process. This will prevent any interruptions or potential issues during the procedure.
- Enable USB debugging: USB debugging is a necessary setting that allows your device to communicate with a computer for various actions, including rooting. To enable USB debugging on your Moto G Pure, follow these steps: a. Go to the Settings app on your device.
b. Scroll down and tap on “About phone” or “About device.”
c. Locate the “Build number” and tap it seven times to enable Developer options.
d. Go back to the main Settings menu, and you should see “Developer options” listed.
e. Tap on “Developer options” and toggle on the “USB debugging” option. - Unlock the bootloader (optional): Unlocking the bootloader is not always necessary for rooting, but it can provide additional flexibility and access to system files. However, keep in mind that unlocking the bootloader will void your device’s warranty and may lead to potential security risks. If you decide to proceed with unlocking the bootloader, refer to the official Motorola website or XDA Developers forums for detailed instructions.
By fulfilling these pre-requisites, you will be fully prepared to proceed with rooting your Moto G Pure. Remember to always exercise caution and perform thorough research before making any modifications to your device.

What is Rooting?
Rooting refers to the process of gaining privileged control or root access over the Android operating system. By rooting your Moto G Pure or Motorola Moto G Pure, you can access and modify system files and settings that are otherwise restricted by the manufacturer. Rooting opens up a world of possibilities for customization and optimization, allowing you to unlock the full potential of your device. Here is a step-by-step tutorial on how to root Moto G Pure:
Advantages of Rooting Moto G Pure:
- Customization: Rooting Moto G Pure gives you the freedom to customize your device by installing custom ROMs, themes, and mods. You can personalize the appearance, interface, and functionality of your Moto G Pure according to your preferences.
- Performance Optimization: With root access, you can remove bloatware, unwanted pre-installed apps, and other system resources that may slow down your Moto G Pure. This can lead to improved performance, faster app launches, and smoother multitasking.
- Enhanced Battery Life: Rooting enables you to install battery-saving apps and tweaks that can optimize power consumption on your Moto G Pure. You can have greater control over app permissions and background processes, thereby extending your device’s battery life.
- Ad-Blocking: Rooting Moto G Pure allows you to block ads system-wide, providing a cleaner and uninterrupted user experience while using apps, browsing the internet, or playing games.
Disadvantages of Rooting Moto G Pure:
- Voiding Warranty: Rooting your Moto G Pure typically voids the manufacturer’s warranty. This means that if any hardware or software issues arise after rooting, you may not be eligible for free repairs or replacements.
- Security Risks: Rooting exposes your Moto G Pure to potential security risks. Once rooted, malicious apps or external sources may gain unauthorized access to your system, compromising your personal data and privacy.
- System Instability: Incorrect or improper rooting procedures can lead to system instability on your Moto G Pure, causing frequent crashes, freezes, or even bricking your device. It is crucial to follow the rooting instructions carefully to avoid such issues.
- Incompatibility with Updates: Rooting may render your Moto G Pure incompatible with official software updates released by the manufacturer. You may lose access to the latest features, security patches, and bug fixes unless you manually install custom ROMs or updates.
Before proceeding with how to root Moto G Pure, carefully evaluate the advantages and disadvantages, ensuring that you understand the risks involved. It’s recommended to perform thorough research, follow reputable guides, and proceed with caution to have a successful rooting experience.

Best 4 Apps to Root Motorola G Pure without Computer
When it comes to how to root Moto G Pure without a PC, there are several reliable apps available that can simplify the process. Here are four popular apps that you can use to root your Moto G Pure without the need for a computer:
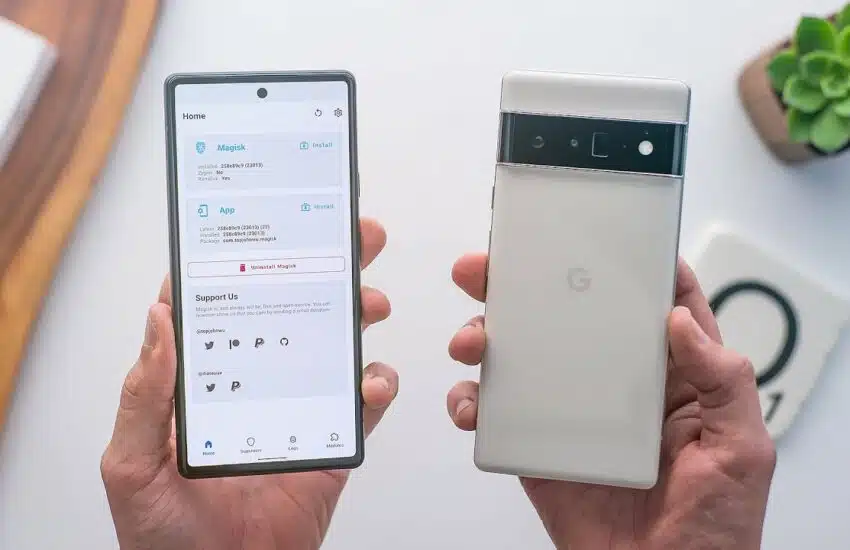
- Magisk Manager:
Magisk Manager is an incredibly powerful rooting app that has gained immense popularity among Android enthusiasts. With Magisk Manager, you can easily root both your Moto G Pure and other Motorola Moto G Pure devices. This app offers a systemless root method, which means it doesn’t modify the system partition of your device. This systemless approach makes it easier to pass SafetyNet checks and allows you to use apps that typically don’t function on rooted devices. - SuperSU:
SuperSU is a well-known and widely used app for rooting Android devices. It provides a simple and straightforward way to gain root access on your Moto G Pure. With SuperSU, you can manage root permissions for individual apps, granting or denying access as needed. The app also offers a user-friendly interface and various settings to customize your root experience. - KingoRoot App:
KingoRoot App is another popular option for rooting Motorola G Pure without a computer. It offers a one-click root solution, making the process quick and hassle-free. The app has a high success rate and supports a wide range of Android devices, including the Moto G Pure. KingoRoot App provides an easy-to-use interface, making it suitable for both beginners and experienced users. - Framaroot:
Framaroot is a lightweight rooting app that provides a simple and convenient method to root your Moto G Pure. It offers a user-friendly interface and supports multiple exploits to gain root access. Framaroot is known for its compatibility with various devices, including Motorola smartphones. The app allows you to root your Moto G Pure with just a few taps, without the need for a computer.
Before choosing any of these apps, it’s important to note that rooting your device may have risks and implications, as mentioned earlier. It’s recommended to research and understand the rooting process for your specific device model and Android version. Additionally, always download apps from trusted sources and follow the instructions provided by the app developers or reputable guides to ensure a successful and safe rooting experience.
How to Root Moto G Pure Using Magisk
Magisk is a popular and powerful tool that allows you how to root Moto G Pure without a computer. With Magisk, you can gain root access to your device, enabling you to customize and optimize its performance. Unlike traditional root methods, Magisk offers a systemless approach, which means it doesn’t modify the system partition. This allows you to pass SafetyNet checks and use apps that typically don’t work on rooted devices. Here is a step-by-step guide on how to root your Moto G Pure using Magisk.

Ordered Steps:
Enable Developer Options and USB Debugging:
- Go to the “Settings” menu on your Moto G Pure.
- Scroll down and tap on “About phone.”
- Locate the “Build number” and tap on it seven times to enable Developer Options.
- Go back to the main “Settings” menu and tap on “Developer options.”
- Enable “USB Debugging” by toggling the switch.
Unlock the Bootloader:
- Visit the official Motorola website and create an account if you don’t have one.
- Follow the instructions provided by Motorola to unlock the bootloader of your Moto G Pure. This step is crucial as it allows you to install custom recoveries and gain root access.
Install a Custom Recovery:
- Download the TWRP (Team Win Recovery Project) recovery image file for your Moto G Pure from the official TWRP website.
- Connect your Moto G Pure to the computer using a USB cable.
- Open a command prompt or terminal window on your computer and execute the following command:
adb reboot bootloader - Once your device is in bootloader mode, flash the TWRP recovery image by executing the following command:
fastboot flash recovery twrp.img - After the flashing process is complete, reboot your Moto G Pure by executing the command:
fastboot reboot
Download and Install Magisk Manager:
- On your Moto G Pure, open a web browser and download the latest Magisk Manager APK file from the official Magisk GitHub repository.
- Once the download is complete, locate the APK file and tap on it to initiate the installation process.
- Follow the on-screen prompts to install Magisk Manager on your Moto G Pure.
How to Root Moto G Pure Using Magisk:
- Open the Magisk Manager app on your Moto G Pure.
- Tap on the “Install” button at the bottom.
- Select “Install” again and choose the “Direct Install (Recommended)” option.
- Magisk Manager will now patch the boot image of your device and install the necessary files.
- After the installation is complete, tap on “Reboot” to restart your Moto G Pure.
Congratulations! You have successfully rooted your Moto G Pure using Magisk. You now have full control over your device’s system files and can enjoy a wide range of customization options and optimizations. Remember to exercise caution when making changes to system files, as any incorrect modifications can potentially cause issues with your device.
How to Root Moto G Pure By SuperSU
SuperSU is a popular app that allows you to root your Motorola G Pure without the need for a computer. By using SuperSU, you can gain root access on your Moto G Pure, giving you greater control over your device and the ability to customize it according to your preferences. Rooting your Moto G Pure using SuperSU can unlock a world of possibilities, from installing custom ROMs to optimizing performance. In this guide, we will walk you through the step-by-step process of rooting your Motorola G Pure using SuperSU.
Ordered Steps:
- Download SuperSU: Start by downloading the SuperSU app from a trusted source. You can find the latest version of SuperSU on reputable app repositories or the official SuperSU website.
- Enable Unknown Sources: Before installing SuperSU, you need to enable the “Unknown Sources” option on your Moto G Pure. To do this, go to Settings > Security > Unknown Sources and toggle the switch to enable it. This allows the installation of apps from sources other than the Google Play Store.
- Install SuperSU: Once you have downloaded the SuperSU APK file, locate it in your device’s storage using a file manager app. Tap on the APK file to begin the installation process. Follow the on-screen instructions to complete the installation of SuperSU on your Moto G Pure.
- Launch SuperSU: After the installation is complete, open the SuperSU app from your app drawer. The app will prompt you to update the SU binary if needed. Follow the prompts to update the binary if necessary.
- How to Root Moto G Pure: With SuperSU installed and updated, you are now ready to root your Moto G Pure. Open the SuperSU app and tap on the “Root” button. The app will initiate the rooting process, and you may be prompted to grant root access to certain apps or system functions. Allow the necessary permissions by tapping “Grant” or “Allow” when prompted.
- Verify Root Access: Once the rooting process is complete, you can verify if your Moto G Pure is successfully rooted. You can use root checker apps available on the Google Play Store to confirm root access. These apps will provide a simple “Rooted” or “Not Rooted” status for your device.
By following these steps, you can root your Motorola G Pure using SuperSU without the need for a computer. Remember that rooting your device may void the warranty and can have certain risks associated with it. Proceed with caution and make sure to follow the instructions carefully to ensure a successful rooting process.

How to Root Moto G Pure By KingoRoot App
KingoRoot App is a popular and user-friendly application that allows you to root your Motorola G Pure without the need for a computer. With a simple and straightforward process, KingoRoot App provides a convenient way to gain root access on your device. By rooting your Moto G Pure using KingoRoot App, you can unlock a world of customization and optimization options. However, it’s important to note that rooting your device may void the manufacturer’s warranty and carry certain risks. Proceed with caution and follow the steps below to root your Moto G Pure using KingoRoot App.
Ordered Steps:
- Download KingoRoot App: Visit the official website of KingoRoot and download the app onto your Moto G Pure directly from your device’s browser. Alternatively, you can download the APK file from a trusted source and manually install it on your device.
- Enable Unknown Sources: Before installing KingoRoot App, you need to enable “Unknown Sources” in the device settings. Go to “Settings” > “Security” and toggle on the “Unknown Sources” option. This will allow the installation of apps from sources other than the Play Store.
- Install KingoRoot App: Locate the downloaded KingoRoot APK file and tap on it to begin the installation process. Follow the on-screen prompts to complete the installation.
- Launch KingoRoot App: Once the installation is complete, open the KingoRoot App on your Moto G Pure.
- Root Your Device: In the KingoRoot App interface, you will find a “Root” or “Start” button. Tap on it to initiate the rooting process. The app will begin the rooting procedure, and you will see the progress on the screen.
- Wait for Rooting to Complete: The KingoRoot App will automatically perform the necessary steps to root your Moto G Pure. It may take a few minutes, and during this process, it’s important not to interrupt or disconnect your device.
- Verify Root Access: After the rooting process is complete, KingoRoot App will display a message indicating successful root access. You can also use root checker apps from the Play Store to verify if your Moto G Pure is rooted.
It’s essential to exercise caution when using any rooting app, including KingoRoot App. Always ensure that you download the app from a trusted source and carefully follow the instructions provided by the app developers. Additionally, be aware of the risks associated with rooting, as mentioned earlier, and proceed at your own discretion.
How to Check If Your Motorola G Pure Is Rooted Successfully or Not?
After successfully rooting your Motorola G Pure, you may want to check if the rooting process was completed successfully. Verifying the root status of your device ensures that you have gained the necessary privileges and access to the system files. Here are the steps to check if your Moto G Pure is rooted successfully:
Download and Install Root Checker App:
- Open the Google Play Store on your Moto G Pure.
- Search for “Root Checker” in the search bar.
- Find a reliable root checker app and install it on your device.
Launch the Root Checker App:
- Once the app is installed, locate its icon on your home screen or app drawer.
- Tap on the Root Checker app to launch it.
Check Root Status:
- Upon launching the app, you will see a simple interface with a “Verify Root” or similar button.
- Tap on the “Verify Root” button to initiate the root status check.
Wait for Verification:
- The app will now analyze your Moto G Pure’s system files to determine if it has root access.
- The process may take a few moments, so be patient and allow the app to complete its analysis.
View Root Status:
- After the analysis is complete, the Root Checker app will display a message indicating the root status of your Moto G Pure.
- If the app confirms that your device is rooted successfully, you will see a message such as “Congratulations! This device has root access.”
- If the app indicates that your device is not rooted, you will see a message like “Sorry! This device does not have proper root access.”
By following these steps and using a reliable root checker app, you can easily determine whether your Motorola G Pure has been rooted successfully. Remember that root access is a powerful feature, so exercise caution when making system-level changes or granting root permissions to apps.
Tips and Warnings for how to Root Moto G Pure
Rooting your Moto G Pure can unlock a world of customization and optimization options. However, it’s important to proceed with caution and follow best practices to ensure a successful rooting process. Here are some tips and warnings to keep in mind when rooting your Moto G Pure:
- Research and Understand the Process: Before rooting your device, take the time to research and understand the specific rooting method for your Moto G Pure model and Android version. Familiarize yourself with the steps, requirements, and potential risks involved.
- Backup Your Data: Prior to rooting, make sure to backup all important data, including contacts, photos, videos, and documents. Rooting can involve system modifications, and there’s a small chance of data loss or device malfunction during the process.
- Use Reliable Sources: Only download rooting tools, apps, and ROMs from trusted sources. Stick to reputable websites and forums with positive user reviews and feedback. Avoid downloading files from unknown or suspicious sources, as they may contain malware or be incompatible with your device.
- Follow Instructions Carefully: When following a rooting guide or tutorial, read and follow the instructions carefully. Skipping steps or performing them out of order can lead to errors or even brick your Moto G Pure. Take your time and ensure you understand each step before proceeding.
- Keep Your Device Charged: Make sure your Moto G Pure has sufficient battery level before starting the rooting process. A dead or low battery can disrupt the rooting procedure and potentially cause issues. It’s recommended to have at least 50% battery charge to avoid unexpected shutdowns.
- Be Aware of Warranty Implications: Rooting your Moto G Pure typically voids the manufacturer’s warranty. Understand that if any hardware or software issues arise after rooting, you may not be eligible for free repairs or replacements. Consider the warranty implications before proceeding.
- Be Cautious with System Modifications: With root access, you can modify system files and settings. Exercise caution when making any changes and avoid deleting or modifying critical system files unless you are confident in what you are doing. Incorrect modifications can lead to system instability or malfunctions.
- Stay Updated with Security Measures: Rooted devices can be more vulnerable to security threats. Keep your Moto G Pure protected by installing reputable security apps, regularly updating your device’s software, and being cautious about granting root permissions to unfamiliar apps.
By following these tips and being aware of the potential risks, you can increase the chances of a successful rooting process while minimizing any issues or complications that may arise. Remember to proceed with caution and make informed decisions throughout the rooting journey. Read this article How to root moto g pure
Conclusion

In conclusion, understanding how to root Moto G Pure or how to root Motorola Moto G Pure is essential to unlock the full potential of your device. By following a Moto G Pure root tutorial and learning how to unlock the bootloader of your Moto G Pure, you can enjoy the benefits of customization and improved performance.
However, it is important to be aware that rooting your device comes with certain risks and considerations. It may void the manufacturer’s warranty and expose your device to potential security vulnerabilities. Additionally, it can lead to system instability and incompatibility with official updates.
To successfully how to root Moto G Pure, it is crucial to research and follow the appropriate steps for your specific device model and Android version. Make sure to back up your data before initiating the rooting process to prevent any potential loss.
Using reliable sources and tools, such as custom recovery for Moto G Pure, is important when rooting your device. Ensure that you have a clear understanding of the process and only grant root permissions to trusted apps.
By taking these precautions and following the necessary steps, you can safely and effectively root your Moto G Pure or Motorola Moto G Pure, unlocking a world of customization and performance optimization.
Ultimately, the decision how to root Moto G Pure should be made after considering the benefits and risks discussed in this guide. Proceed with caution, make an informed decision, and take responsibility for any consequences that may arise.
Remember, rooting can provide exciting possibilities for customization and optimization, but it is essential to understand the process, risks, and implications before proceeding. If you decide to root your Moto G Pure, follow reputable guides and resources to ensure a safe and successful experience. Read this article How to root moto g pure
Frequently Asked Questions
Can Motorola phones be rooted?
Yes, Motorola phones, including the Moto G Pure, can be rooted. However, it’s important to note that rooting your device may void the manufacturer’s warranty and comes with certain risks.
How do I activate Moto G Pure?
To activate your Moto G Pure, follow these steps: Power on your device by pressing and holding the power button. Follow the on-screen instructions to set up your device. Connect to a Wi-Fi network and sign in with your Google account. Complete the setup process by personalizing your device settings.
Is it safe to root Moto G Pure?
Rooting your Moto G Pure comes with certain risks and implications. While it offers customization and optimization benefits, it can also expose your device to security vulnerabilities and system instability. It’s important to research and understand the risks involved before proceeding. Read this article How to root moto g pure
Are there any risks associated with rooting Moto G Pure?
Yes, there are risks associated with rooting your Moto G Pure. These risks include voiding the warranty, potential security vulnerabilities, system instability, and incompatibility with official updates. It’s crucial to proceed with caution, follow reputable guides, and make informed decisions throughout the rooting process. Read this article How to root moto g pure
Are there any custom ROMs available for Moto G Pure after rooting?
Yes, after rooting your Moto G Pure, you can explore a variety of custom ROMs available for your device. Custom ROMs offer different features, customization options, and improved performance. However, it’s important to research and select a reputable custom ROM that is compatible with your Moto G Pure model to ensure a smooth and stable experience. Read this article How to root moto g pure
Read more:
Greetings, tech enthusiasts! I’m Deshani Dananjana, a wordsmith navigating the intersection of language and technology. With a Diploma in English, a Diploma in IT, and a Certificate in Graphic Design, I’ve cultivated a diverse skill set to articulate... Read more
Related Posts
How to root Pixel 6 pro